Hi All, It's been a while since I've been up and running. I found a site, that you can download videos of different stitches!!! Waaaaaaaaaaaaay too cool!!! It is actually for the knitting machines, but when you see them you'll know how to do the same things on the loom. I'm pretty sure this is where Isela got the Mariposa (butterfly) stitch. These have been around for quite a while, so they are all tried and true. I like the tuck stitch as well. Give it a look, the videos for download are at the bottom of the page.............
http://knitfits.theotherbell.com/bond-video-club.htm
I've tried them all, and they are really nice!!! What's nice too ias that you can download them to your puter, and there they are when you need em.
Lotsa Hugs,
Loomin Cat
Wednesday, October 25, 2006
Friday, September 15, 2006
designing your own "Picture"
Hi All,
I have had great fun using cookie cutters for my pattern on the cloths. I just lay the cookie cutter on the graph paper, trace around it, and then work it into a pattern. From that chart, I write it out into written form.
I also got a coloring book for very small children. It is great for shapes to make into patterns. Just trace the pic onto the graph paper, and off you go!!!
Hugs,
Loomin Cat
Hi All
Hi Everyone,
I am almost back to "normal". After my son-in-law left for Iraq, my trip south for Hurricane Ernesto, my son's girlfirends brother died of Cancer, I think now things are calming down.
I have been away from the groups, for about 2 weeks now. I just found I was taken off, as co-moderator of the Looming Dishcloths group! I wrote privately to Janice asking why, but have gotten no answer. That really hurt my feelings, but I plan to stay in the group as a lurker. I am still willing, and eager to help anyone, whenever they ask.
I just don't get it. There are a few very high profile ladies who give excellent help, and a couple who come up with some beautiful patterns that they so kindly share with all of us. But a couple of them just seem to have a way of knocking any "new" people from really getting involved with conversions, or pattern designing. My little dishcloth rake is something that no one else is making, so can't see where that is a threat to anyone. Is this an ego thing? Or a money making thing? Don't know, and don't care anymore.
I will be converting patterns, designing patterns, and still trying to make my dishcloth rake. I really enjoy it, and love to share with all of you.
I'm probably babbling here, but it's my blog, so I can LOL
Hugs to all of you, and God bless.
Loomin Cat
Thursday, September 07, 2006
Buy or make your own row counters
This page has several models:http://www.yarn- store.com/ row-counters. html
then there's the ever famous 'Peg-it':http://www.purpleki ttyyarns. com/index. asp?PageActionfiltered= VIEWPROD& ProdID=1648
http://www.knitpick s.com/Tools/ itemid_80264/ Tools_display. aspx
There are some that you can make:http://www.knitpick s.com/tools/ itemid_80232/ tools_displayhttp://www.knitpick s.com/tools/ itemid_80032/ tools_displayhttp://people. delphiforums. com/knit_ chat/knitchat/ Counter.htmhttp://westenddesig nsknits.blogspot .com/2006/ 08/row-counter- tutorial. htmlhttp://www.suziskni ts.com/counterdi rectionsc. html , http://www.suziskni ts.com/rowcounte rsales.htmlhttp://seahorse- designs.com/ seahorse_ designs_002. htm
Friday, August 18, 2006
Buy a Loom or Rake
Hi All,
NEW NEWS!!!
I am in the process of getting grooved wooden pegs, I think these may be the best so far!!! Keep tuned for latest news.!!!!! and wish me luck!!! Will know by Monday!!!
Here are the loom makers that I have found to be honest, and very talented.......I hope you will support them.
You can get beautiful Dishcloth rakes from Dux, a talented loomer, and makes a quality product. Beautifully decorated!! Go to eBay under seller ID D U X A L L I N A R O W
Anyone who wants to contact her about looms or dishcloth rakes can do so at duxallinarow@mac.com
or, her really great blog:
http://duxallinarow.blogspot.com/
I just found this site: The LoomRoom: http://www.loomroom.com/ they have wonderful looms, with beautiful strong wooden pegs!!! The prices are great, and the owners extremely nice. Check em out
Another really good place for looms, and rakes is CinDwood. Quality, at a very good price!!! I love doing business with her. Go To:
http://www.cindwoodcrafts.com/
And Last, but in no way least, Lynn Markman. Again, very good quality, and personal service!!
Go To:
http://lynnmarkmangiftsncards.bizland.com/
These are the loommakers I would recommend. The looms are not pounded out in mass amounts, they have very good prices, and the very best of service, and quick delivery!!
I left out Decor Accents, because of their poor customer satifaction. There are no returns, except for "store credit", long wait to receive orders, and so many have complained about not getting responses from them. This is purely my opinion, and past experience. Others may differ in their opinion.
Getting Ready For Winter!!
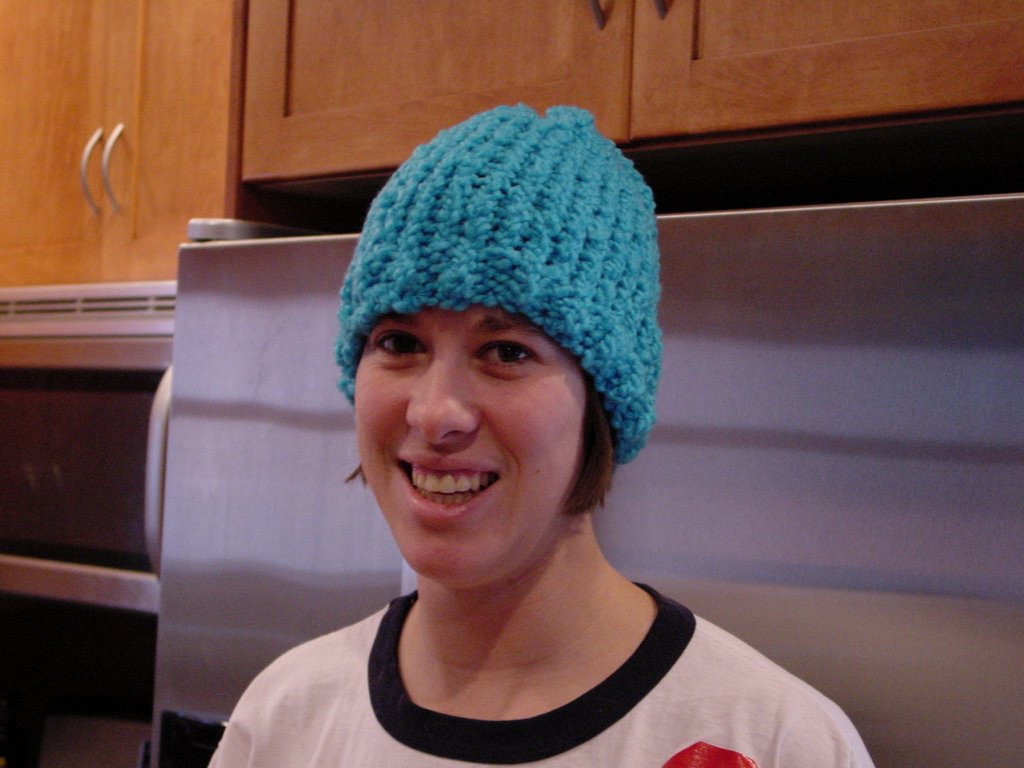
This is sweet Daughter-in-Law modeling her new hat. So easy on the green KK!!
Monday, August 14, 2006
Simple Wrist Warmers/Fingerless Gloves
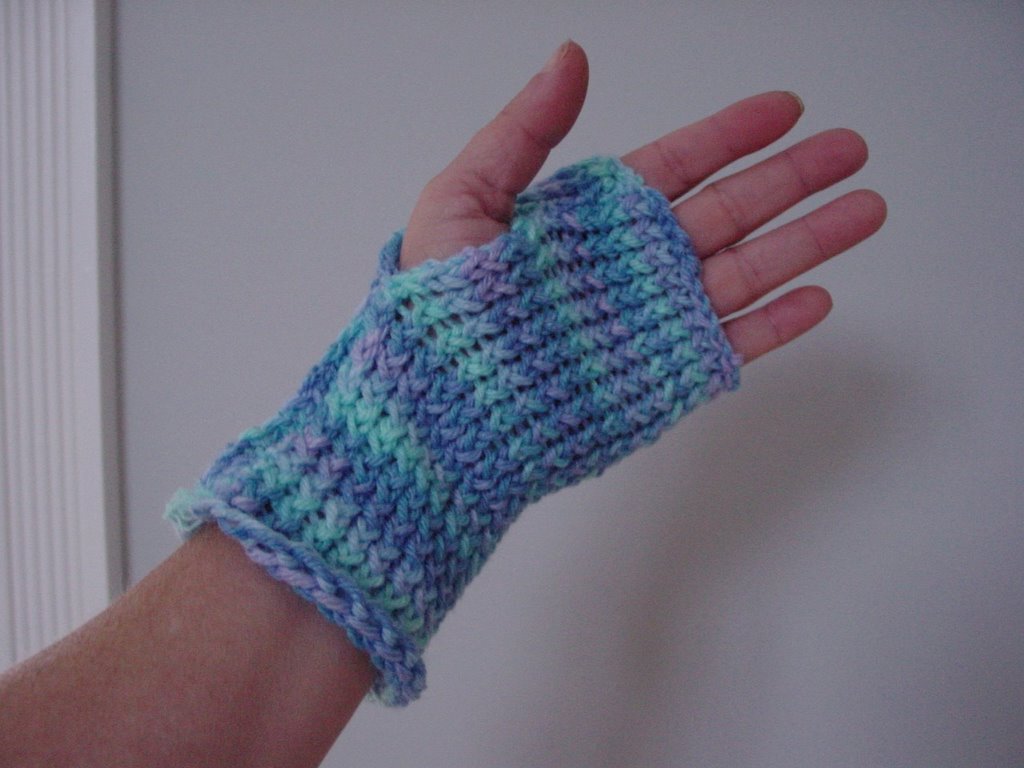
Fingerless Gloves
Designed by Cathy Rodammer/Loomin' Cat
You will need:
1 Skein of worsted weight yarn
Dishcloth Rake
(a small guaged loom will do, maybe need 2 strands)
Cast on 27
Rows 1-7 Ribbed stitch (K,P,K,P, across each row)
Row 7-? e-wrap and knit each row till it is the length you want.
Bind off with crochet method
Sew up the side, leaving a 1 inch opening for your thumb.
YAY........Easy fingerless gloves!
(c) 2006 Loomin'Cat Designs/Cathy Rodammer. For personal use only. All rights reserved
Mitten made on rake in one piece No thumb sew up
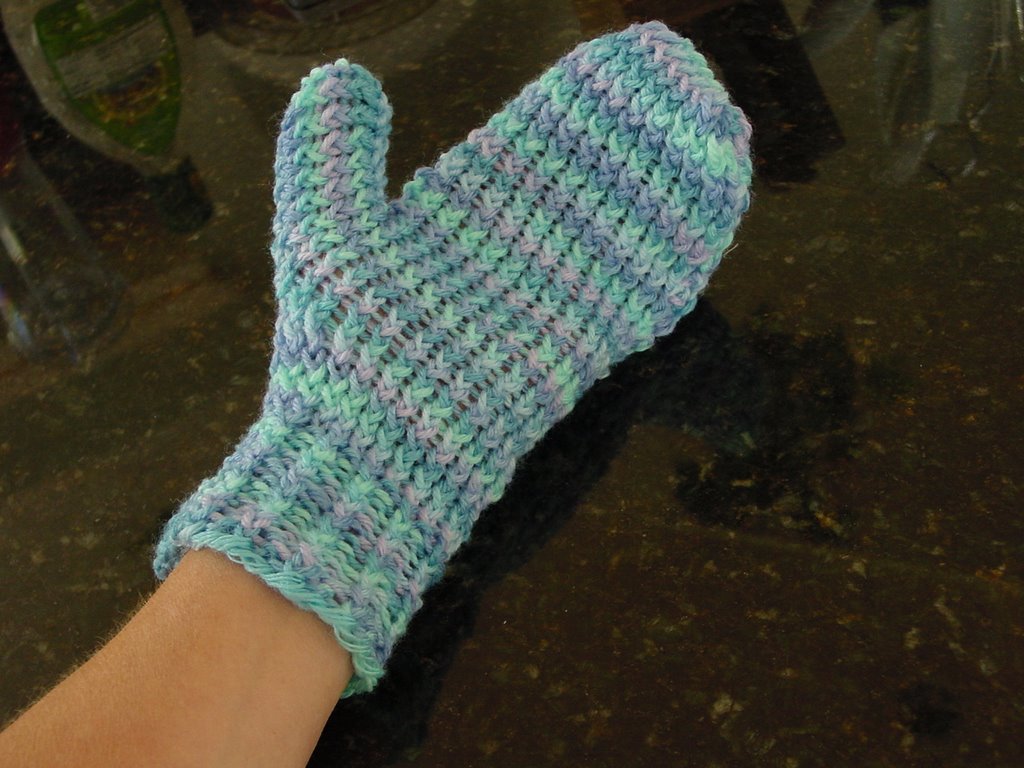
Easy Mitten
(c) 2006 Loomin'Cat Designs/Cathy Rodammer. For personal use only. All rights reserved
Make 2
You will need:
1 skein Yarn of your choice
Dishcloth rake, or small guaged loom
1 strand on dishcloth rake, maybe 2 strands on small guaged loom
Cast on 16 st
Row 1-14: Rib stitch
Row 15-22: Knit across
Row 23: Short row, knit stiches 1,2,3
Row 24: Short row, knit stitches 3,2,1
Row 25: Cast on 7 more stitches on the left side.
Row 26: Knit across all 23 stitches
Row 27-31: knit across all 23 stitches
Row 32: Bind off the added 7 stitches from row 25
Row 33-101: Knit across all 16 (or measure your hand from the thumb to the top of your fingers for how many rows to knit across)
Row 102: Cast on 7 stitches on left side
Row 103-109: Knit across all 23 stitches
Row 110: Bind off added 7 stitches
Row 111: Short row, Knit stitches 1,2,3
Row 112: Short row, Knit stitches 3,2,1
Row 113-120: Knit across all 16
Row 120-134: Rib stitch
Bind off with crochet method. Do not cut yarn
With right sides together:
Can either crochet all around mitten, or sew up around with yarn needle. turn right side out, and weave in ends.
Thursday, August 03, 2006
No More buying swiffer covers
I use my old worn out dishcloths on my swiffer, they work fantastic!!
Or if you want, here is a link to a great pattern to make your own swiffer cover. It's a knit pattern, but can be done on a loom with no converting. I made one, and it is fantastic!! Save a lot of money!!
http://www.knitplayground.com/archive/freepatternsmay.html
Angela wrote in and gave me this site, which has the cover with loom directions!!! Thank you Angela!! Here it is:
http://tinyurl.com/kumc9
Hugs,
Loomin' Cat
Fingerless gloves
Fingerless Gloves
Designed by Cathy Rodammer/Loomin' Cat
You will need:
1 Skein of worsted weight yarn
Dishcloth Rake
(a small guaged loom will do, maybe need 2 strands)
Cast on 27 pegs with 1 strand
Rows 1-7 Ribbed stitch (K,P,K,P, across each row)
Row 7-? e-wrap and knit each row till it is the length you want.
Bind off with crochet method
Sew up the side, leaving a 1 inch opening for your thumb.
YAY........Easy fingerless gloves!
(c) 2006 Loomin'Cat Designs/Cathy Rodammer. For personal use only. All rights reserved
Monday, July 31, 2006
A Single Cross Cloth
A Simple Cross
Designed by Loomin' Cat
July 2006
You will need:
1 ball sugar and Cream, or equivalent cotton yarn
Dishcloth Rake
or small guage loom
Cast on 40 pegs Right to left.
Row 1: Purl across
Row 2 : Knit across
Row 3 : Purl across
Row 4 : Knit across
Row 5: Purl across
Row 6: and all even rows, Knit across
Row 7: P3, K34, P3
Row 9: P3, K34, P3
Row 11: P3, Knit 15, P4, K15, P3
Row 13, 15, 17: P3, Knit 15, P4, K15, P3
Row 19: P3, K7, P20, K7, P3
Row 21, 23,25,: P3, K7, P20, K7, P3
Row 27: P3, Knit 15, P4, K15, P3
Row 29,31,33,35,37,39,41,43,45, 47, 49: P3, Knit 15, P4, K15, P3
Row 51: P3, K34, P3
Row 53: P3, K34, P3
Row 54: Knit across
Row 55: Purl across
Row 56: Knit across
Row 57: Purl across
Row 58: Knit across
Bind off with crochet method
(c) 2006 Loomin'Cat Designs/Cathy Rodammer. For personal use only. All rights
reserved
Teacup Cloth
Loomed Teacup dishcloth
copyright 8/04 by Rhonda K. White
Conversion to Loom by Loomin Cat
with permission from
Rhonda K. White
You will need:
1 Ball S&C
Dishcloth rake, or small guage loom
Cast on 38 stitches
1: Purl across
2: Knit across
3: Purl across
4: Knit across
5: P3, K32, P3
6: and all remaining even rows; knit across
7: P3, K6, P3, K4, P5, K3, P3, K1, P2, K5, P3
9: P3, K5, P5, K2, P6, K2, P7, K5, P3
11 & 13: P3, K5, P2, K1, P2, K1, P4, K5, P2, K3, P2, K5, P3
15: P3, K5, P2, K4, P7, K2, P2, K3, P2, K5, P3
17: P3, K5, P2, K4, P3, K2, P2, K2, P7, K5, P3
19: P3, K3, P6, K3, P2, K2, P2, K2, P7, K5, P3
21: P3, K3, P6, K4, P4, K4, P3, K1, P2, K5, P3
23: P3, K5, P2, K25, P3
25: P3, K5, P2, K2, P11, K12, P3
27: P3, K8, P13, K11, P3
29: P3, K7, P15, K10, P3
31: P3, K6, P17, K9, P3
33: P3, K5, P20, K7, P3
35: P3, K5, P22, K5, P3
37: P3, K4, P20, K2, P2, K4, P3
39: P3, K4, P20, K3, P3, K2, P3
41: P3, K3, P4, (MB, P1, MB, P3) 3 times, K3,P2, K2, P3
43: P3, K3, (P5, MB) 3 times, P5, K2, P2, K2, P3
45: P3, K3, P4, (MB, P1, MB, P3) twice, MB, P1, MB, P8, K2, P3
47: P3, K2, P27, K3, P3
49: P3, K2, P24, K6, P3
51: repeat #49
53-56: repeat rows 5 & 6
57-59: Purl across
58-60: Knit across
Bind off
Bobble=Bobble stitch:
Wrap peg 5 times, lift bottom stitch over the top of the 5 wraps so it sits on the top of the peg. Knit off the five wraps over the top of the lifted stitch.
MB=Mini Bobble= Same as Bobble, only wrap peg 3 times instead of 5 times


Snowy Christmas
Hi All, It's been so hot here (and everywhere I hear) I guess I got thinking about nice cool snow. LOL Here is a sweet snowy Christmas tree. The snow is mini bobbles.
Snowy Christmas
(c) 2006 Loomin'Cat Designs/Cathy Rodammer. For personal use only. All rights
reserved
You will need:
1 Ball S&C
Dishcloth rake
Start right to left
Rows 1-5 Garter Stitch= Purl across, Knit across for these 5 rows
Rows 6, 8, 10 Knit across
Rows 7, 9 P3, K34, P3
Row 11 P3, K2, MB, K4, MB, K8, P3, K3, MB, K4, MB, K6, P3
Row 12 K24, MB, K13
Row 13 P3, K5, MB, K10, P3, K1, MB, K3, MB, K5, MB, K3, P3
Row 14 K40
Row 15 P3, K7, MB, K4, MB, K3, P3, K3, MB, K3, MB, K7, P3
Row 16 K7, MB, K25, MB, K6
Row 17 P3, K10, MB, K5, P3, K5, MB, K9, P3
Row 18 K5, MB, K9, MB, K6, MB, K17
Row 19 P3, K16, P3, K15, P3
Row 20 K7, MB, K9, P5, K18
Row 21 P3, K8, MB, K5, P2, K3, P2, K2, MB, K10, P3
Row 22 K10, MB, K4, P2, K2, P1, K2, P2, K16
Row 23 P3, K6, MB, K5, P2, K2, P3, K2, P2, K7, MB, K3, P3
Row 24 K13, P2, K2, P5, K2, P2, K8, MB, K5
Row 25 P3, K10, P2, K2, P2, K3, P2, K2, P2, K4, MB, K4, P3
Row 26 K10, MB, K1, P1, K2,P2, K2, P1, K2, P2, K2, P1, K13
Row 27 P3, K5, MB, K6, P2, K2, P3, K2, P2, K11, P3
Row 28 K5, MB, K7, P2, K2, P5, K2, P2, K2, MB, K11
Row 29 P3, K11, P1, K2, P2, K3, P2, K2, P1, K4, MB, K5, P3
Row 30 K15, P2, K2, P1, K2, P2, K10, MB, K5
Row 31 P3, K6, MB, K5, P2, K2, P3, K2, P2, K2, MB, K8, P3
Row 32 k6, MB, K7, P1, K2, P5, K2, P1, K15
Row 33 P3, K3, MB, K10, P2, K3, P2, K13, P3
Row 34 K11, MB, K3, P2, K2, P1, K2, P2, K2, MB, K13
Row 35 P3, K7, MB, K5, P1, K2, P3, K2, P1,K6, MB, K5, P3
Row 36 K16, P5, K18
Row 37 P3, K14, P2, K3, P2, K13, P3
Row 38 K6, MB, K6, MB, K2, P1, K2, P1, K2, P1, K17
Row 39 P3, K2, MB, K2, MB, K3, MB, K6, P3, K15, P3
Row 40 K5, MB, K4, MB, K6, P5, K1, MB, K16
Row 41 P3, K15, P1, K3, P1, K14, P3
Row 42 K19, P1, K9, MB, K10
Row 43 P3, K3, MB, K12, P1, K1, P1, K3, MB, K6, MB, K4, P3
Row 44 K19, P1, K5, MB, K14
Row 45 P3, K5, MB, K3, MB, K5, MB, K1, P1, K2, MB, K5, MB, K7, P3
Rows 46, 48,50 Knit across
Rows 47, 49 P3, K34, P3
Rows 51-55 Garter stitch= Purl across, Knit across for these 5 rows
MB=Mini Bobble:
Wrap 3x around peg, and lift bottom loop to the top,
then lift the 3 loops you just wrapped over the original loop. Mini Bobble made.
Hugs,
Cathy
Loomin Cat
Sunday, July 02, 2006
How to Design your own Pattern
Design your Own Dishcloths
The first thing I do is print out a Knitting Graph......... I copied the graph paper from
or I like this one:
http://www.tata-tatao.to/knit/matrix/e-index.html
Then I put the graph paper inside a plastic sleeve. You can get them at any office supply store.
Then, using a wet erase, or dry erase marker, I start to draw in my design, using red for purl stitches, green for knit stitches. I decide whether to have a knit row, between design rows, or to just have the picture more dense with pattern on each line. Another reason for the knit row in between the pattern rows, is to keep the pattern on one side of the cloth. When you don't have the knit row, the pattern is clear on both sides. If I decide to have the knit row, (which I prefer) I highlight every other row, so I know where to put my pattern rows.
Then , I loom it, to see if it is going to work, writing down, if I start right to left, or left to right.
Then, when I am satisfied, I just write out the pattern counting the red squares, and the green squares.
Then you can scan the design in your plastic sleeve,(with the graph paper still inside).LOL
and you have a copy of your work, from start to finish.
And then wipe the sleeve clean with a soft cloth, and you're ready to go again.
Voila!!! It's not so hard, and you can be as creative as you please.
Happy Designing,
Loomin' Cat
Tuesday, June 27, 2006
Baby Feet Dishcloth

This is one of my favorites!!!
Baby Feet Cloth ©copyright 7/12/05 by Rhonda K. White
conversion by Cathy Rodammer/Loomin Cat
you will need:
1 Ball S&C cotton Yarn
Dishcloth Rake
Cast on 34 stitches
1 & 3: Purl across
2 & 4: Knit across
5: P4, K26, P4
6: (and even numbered rows through #50) Knit across
7: P4, K8, P2, K16, P4
9: P4, K7, P4, K15, P4
11: P4, K6, P5, K15, P4
13: P4, K6, P5, K15, P4
15: P4, K5, P5, K16, P4
17: P4, K5, P4, K7, P2, K8, P4
19: P4, K5, P4, K6, P4, K7, P4
21: P4, K4, P5, K6, P5, K6, P4
23: P4, K4, P6, K5, P5, K6, P4
25: P4, K4, P7, K5, P5, K5, P4
27: P4, K4, P7, K6, P4, K5, P4
29: P4, K5, P7, K5, P4, K5, P4
31: P4, K4, MB, K1, P6, K5, P5, K4, P4
33: P4, K5, MB, K1, P4, K5, P6, K4, P4
35: P4, K6, MB, K1, MB, K6, P7, K4, P4
37: P4, K10, bobble, K4, P7, K4, P4
39: P4, K14, P7, K5, P4
41: P4, K14, P6, K1, MB, K4, P4
43: P4, K15, P4, K1, MB, K5, P4
45: P4, K17, MB, K1, MB, K6, P4
47: P4, K15, bobble, K10, P4
49: P4, K26, P4
50: Knit across
51 & 53: Purl across
52 & 54: Knit across
55: Purl across
Bind off with crochet method
Bobble=Bobble stitch:
Wrap peg 5 times, lift bottom stitch over the top of the 5 wraps so it sits on the top of the peg. Knit off the five wraps over the top of the lifted stitch.
MB=Mini Bobble= Same as Bobble, only wrap peg 3 times instead of 5 times
Monday, June 26, 2006
My New Baby, Berry Basket

I just love the color, and This was a very easy pattern to do.
One of those you don't have to pay so much attention to........a "Drag Along" project LOL.
Berry Basket
design by Cathy Rodammer
You will need:
1 Ball cotton yarn
dishcloth rake
10 stitches, 10 rows for pattern,
Pattern:
Cast on 40
Rows 1,2,3,4,5: K5, P5, across
Rows 6,7,8,9,10: P5, K5 across
Continue repeating these 10 rows, till you have the length you want.
Bind off with crochet method
(c) 2006 Loomin'Cat Designs/Cathy Rodammer. For personal use only. All rights
reserved
Wednesday, June 21, 2006
One of Those Days

I gotta tell you............
It is a rainy dreary day, I am on a diet, and I wanted to bake soooooooo bad....perfect day for it. Well I got a package, and as I was opening it, A wonderful smell of bananas wafted out, and I immediately got my "Rainy day Baking" urge satisfied! It is a wonderful "flameless candle" in a basket that I got from Candles by Toni, her link is on the right. What a treat on a dreary day!!!
Thanks Toni!!!
Tuesday, June 20, 2006
Ripple dishcloth..Sooooo Easy

Ripple Stitch
(Looks real nice with variegated yarn)
1 Ball of sugar and cream cotton
Dishcloth rake
Cast on 38
multiple of 8 stitches plus 6
Row 1: K6, * P2, K6: repeat from *
Row 2: P1, * K4, P4, repeat from * end with K4, P1
Row 3: P2, * K2, P2, repeat from *
Row 4: K1, *P4, K4, repeat from * end with P4, K1
Row 5: K2, *P2, K6, repeat from * end with P2, K2
Row 6: K6, *P2, K6, repeat from *
Row 7: P1, *K4, P4, repeat from * end with K4, P1
Row 8: P2 *K2, P2, repeat from *
Row 9: K1, *P4, K4 repeat from * end with P4, K1
Row 10: K2, *P2, K6 repeat from * end with P2, K2
Repeat rows 1 through 10 for pattern
When it is length you like, bind off with crochet method.
instructions for loomed bobble stitch
Bobble stitch:
Wrap peg 5 times lift bottom stitch over the top of the 5 wraps so it sits on the top of the peg. Knit off the five wraps 1 at a time over the top of the lifted stitch.
Mini Bobble:
Same as Bobble, but only wrap 3 times
Wrap peg 5 times lift bottom stitch over the top of the 5 wraps so it sits on the top of the peg. Knit off the five wraps 1 at a time over the top of the lifted stitch.
Mini Bobble:
Same as Bobble, but only wrap 3 times
Monday, June 19, 2006
Bobbles the sheep dishcloth
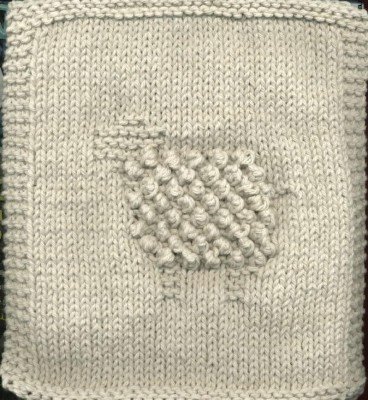
Bobbles the sheep Loomed
Bobbles the Sheep cloth
©2004 by Rhonda K. White
Before casting on, if you want,
you can string one small black
bead onto yarn for the "eye" about 5mm
Cast on 36 stitches
Row 1 to 4 Garter stitch (pkpk)
Row 5 P3 K30 P3
Row 6 and all even rows, Knit across
Row 7- 16 repeat 5 and 6
Row 17: P3 K12 P2 K4 P2 K10 P3
Row 19: P3 K12 P2 K4 P2 K10 P3
21: P3 K12 P2 K4 P3 K9 P3
23: P3 K11 (P1 bobble) 5 times K9 P3
25: P3 K11 (bobble P1) 5 times bobble K8 P3
27 P3 K10 (bobble P1 ) 6 times K8 P3
29: P3 K10 (P1 bobble) 6 times K8 P3
31: P3 K10 (bobble P1 6 times K8 P3
33: P3 K9 P1 (P1 bobble) 6 times P2 K6 P3
35: P3 K8 P1 (P1 bobble) 6 times P1 K8 P3
37: P3 K6 P5 (bobble P1) 5 times K9 P3
39: P3 K6 P7 K17 P3
41: P3 K6 P3 Bead P3 K17 P3
or
41: P3 K6 P7 K17 P3
43 P3 K8 P3 K19 P3
45-56: Repeat rows 5 and 6
57-60: Garter stitch (kpkp)
Crochet bind-off
Bobble stitch:
Wrap peg 5 times lift bottom stitch over the top of the 5 wraps so it sits on the top of the peg. Knit off the five wraps over the top of the lifted stitch.
Or secondary method:
Bobble stitch:
*Wrap peg, lift bottom stitch and pull wrap to the bottom of peg.* Holding the wrap you just pulled to the bottom repeat between ** 4 more times. Knit off all wraps over the top of the stitch they are pulled through.
A"maze"ing Dishcloth/Placemat

A"Maze"ing Placemat
(or dishcloth or afghan panel, or table runner)
designed by
Loomin' Cat
June 2006
You will need:
1 ball sugar and cream cotton yarn
dishcloth loom
Guage 3 stitches per inch 5 rows per inch
This pattern is a multiple of 10 stitches, and 16 rows
For Placemat:
Cast on 36 Pegs
Pattern directions:
Do 5 rows of Knit 1 row, Purl 1 row (Border)
Row 1: P3(P1 K1 P1 K7)x3, P3
Row 2: K3(K7 P1 K1 P1) x3, K3
Row 3: P3(P1 K1 P7 K1) x3, P3
Row 4: K3(K1 P7 K1 P1) x3, K3
Row 5: P3(P1 K7 P1 K1) x3, P3
Row 6: K3(K1 P1 K7 P1) x3, K3
Row 7: P3(P7 K1 P1 K1) x3, P3
Row 8: K3(K1 P1 K1 P7) x3, K3
Row 9: P3(K6 P1 K1 P1 K1)x3, P3
Row 10: K3(K1 P1 K1 P1 K6) x3, K3
Row 11: P3(P3 K1 P1 K1 P4) x3, P3
Row 12: K3(P4 K1 P1 K1 P3) x3, K3
Row 13: P3(K4 P1 K1 P1 K3)x3, P3
Row 14: K3(K3 P1 K1 P1 K4) x3, K3
Row 15: P3(P3 K1 P1 K1 P4) x3, P3
Row 16: K3(P4 K1 P1 K1 P3) x3, K3
Repeat these 16 rows 4x more or till you're happy with length.
Do 5 rows of Knit 1 row, Purl 1 row. (Border)
Bind off with crochet method.
For dishcloth, Cast on 40 pegs, and omit border. (the border is the first and last 5 rows, and the
K3 and P3 at the beginning and end of each row.)
You can also keep going, and make a nice panel for an afghan, or bedspread, or Tablerunner
(in which case I would do 40 pegs)
(c) 2006 Loomin' Cat Designs/Cathy Rodammer. For personal use only. All rights
reserved
Enjoy!!! And happy Loomin'
Friday, June 16, 2006
Why a dishcloth rake??
The weather is so nice here in Michigan today, I've been outside on the porch just a loomin away............Think I may need a nap now, the wind in the trees always gets to me after a while. LOL Love that sound!!!!!
I have heard so many comments on why do I just do dishcloths with the rake. Well I don't LOL I make the 14" squares for afghans, I make the placemats, also, if I really like the pattern, it becomes a tablerunner, or long panel for an afghan. I also make scarves, and slippers on it. Pretty much anything I want to use only 1 strand of worsted weight on, I make it on the "Dishcloth rake"
I have heard so many comments on why do I just do dishcloths with the rake. Well I don't LOL I make the 14" squares for afghans, I make the placemats, also, if I really like the pattern, it becomes a tablerunner, or long panel for an afghan. I also make scarves, and slippers on it. Pretty much anything I want to use only 1 strand of worsted weight on, I make it on the "Dishcloth rake"
Thursday, June 15, 2006
A great website
Many of the dishcloths I have been doing, come from Knitting Knonsense website........all designed by Rhonda K. White.
Check out her site by clicking on the link to the right.
Check out her site by clicking on the link to the right.
How to convert from 2 needle knit to loom knit
First you need to change all the purls to knit, and all the knits to purls.
Then, if there is no knit across rows between rows, then you need to read every other row right to left:
1st row left to right, next row right to left.
kpkpkp-----> 1st row
pkpkpk <--------2nd row etc.
If there is a row knit across between rows, the just read it as is.
If you are reading from a chart, then read 1st row right to left, then second row left to right.
kpkpkpkp-------->2nd row etc.
pkpkpkpk<------- 1st row
Crazy Triangles dishcloth
Crazy Triangles Dishcloth
by Cathy Rodammer/Loomin Cat
CO 40 Pegs
Border:
Row 1 P across
Row 2 K across
Row 3 P across
Row 4 K across
Pattern:
Row 1: P2 * P1 K5 P5 K1 (repeat from *) to P2
Row 2: K2 * K2 P4 K4 P2........................to K2
Row 3: P2 * P3 K3 P3 K3........................ to P2
Row 4: K2 * K4 P2 K2 P4.........................to K2
Row 5: P2 * P5 K1 P1 K5...................... .to P2
Row 6: K2 * K6 P6...................................to K2
Row 7: P2 * P5 K1 P1 K5....................... .to P2
Row 8: K2 * K4 P2 K2 P4.........................to K2
Row 9: P2 * P3 K3 P3 K3.........................to P2
Row 10: K2* K2 P4 K4 P2.........................to K2
Row 11: P2 * P1 K5 P5 K1.........................to P2
Row 12: K2 * P6 K6...................................to K2
Repeat rows 1-12 to desired length
Repeat pattern approximately 5x for 10x10
Repeat pattern " 6x for 12x12
Bottom Border:
Row 1: K
Row 2: P
Row 3: K
Row 4: P
(c) 2006 Loomin' Cat Designs/Cathy Rodammer. For personal use only. All rights
reserved
Subscribe to:
Comments (Atom)